
-
Basic electronic
In this section we will work on basic electronic concepts such as Ohm's law, resistors, initial basic circuits, etc.
Pololu motor controller
Hardware required
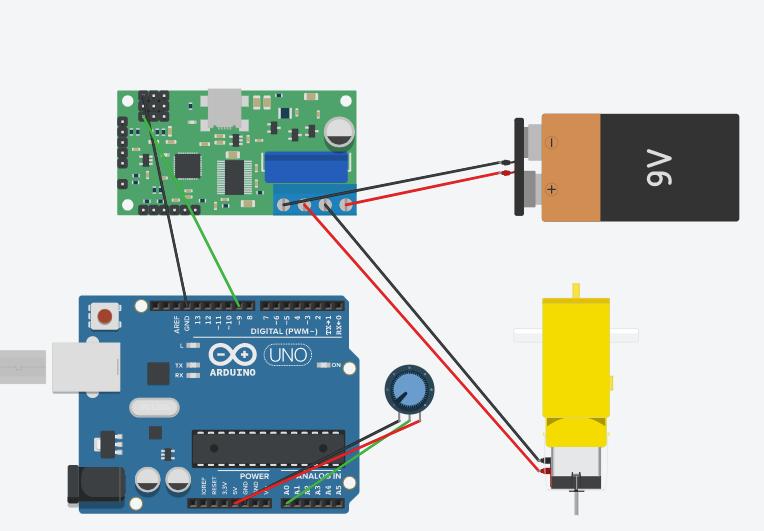
- Arduino Board
- Simple Pololu motor controller 18V7 or G218V15 (more modern)
- A 9V battery
- DC Motor
- Breadboard
- Jumper wires
Theoretical concepts
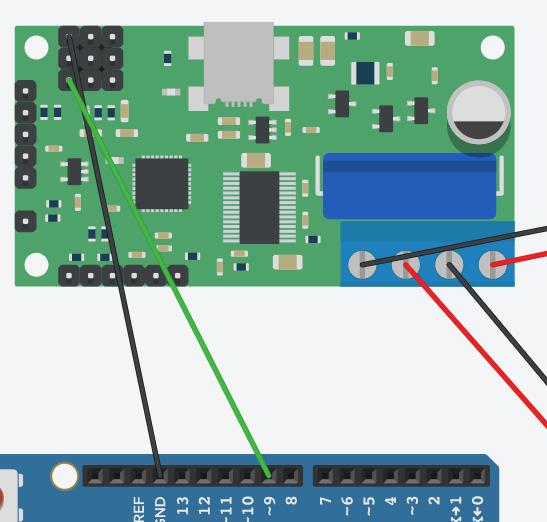
The Pololu simple motor controller is one of the most widely used motor controllers in basic electronics projects with Arduino. You have the option of using the 18v7 model or the G2 which is more modern.
This type of electronic devices greatly facilitates the basic control of brushed DC motors. This type of motors can be found in many toys.
The advantage of these motor controllers is that they accept currents from 5.5 to 30 V, so they can generate enough power for many types of DC motors.
In this project, we have used a potentiometer to control the revolutions of the DC motor. A potentiometer is basically a resistor which can change its value. It is an element that has always been widely used in electronics. Surely if you open an old radio you will find a potentiometer.
You can find more information about the Polou Motor Controller in this link.
Code
#include <Servo.h> // Servo library included
Servo Myservo;
// Defining the servo object
int Mypotenciometro = 0;
// Pin used to connect the potentiometer
int valor;
// this variable will define the RPM of the motor
void setup() {
Myservo.attach(9);
// Defining the signal pin of the servo
}
void loop() {
valor = analogRead(Mypotenciometro);
//Reading the value of the potentiometer (the value is in between 0 and 1023)
valor = map(valor,0,1023,0,180);
Myservo.write(valor);
delay(10);
// waiting for the next iteration of the loop
}